A Hobbit Journey 

This is a little blurb about the craft itself


…crafting offline? Download a PDF of the instructions here

Supplies: 

Lembas Bread

Tools
  • An oven pre-heated to 325°
  • A hand or stand mixer
  • A bowl for mixing in
  • Spatula or spoon for stirring
  • Cookie sheet
  • Parchment paper or silpat
  • A clean work surface to knead dough on
  • Rolling pin
  • Biscuit cutter or butter knife for shaping
  • Hot pads
Ingredients
  • 1 cup butter, brought to room temperature (the Motley Kids have a dairy allergy in the house, so we use vegan butter from Flora or Miyoko’s Creamery as a substitute)
  • 1/4 cup brown sugar
  • 1/8 cup honey (if you oil your measuring cup before you measure the honey it comes out a little easier)
  • 2 cups unbleached flour

Hobbit Cloaks

  • A T-shirt you don’t mind destroying
  • Scissors for cutting fabric
  • Hot glue (always!)
  • Stiff felt
  • A large button (the kind with holes)
  • A chenille stem cut in thirds
  • Bling!
Optional: 
  • Double stick foam tape (instead of hot glue sewing)
  • Leaves from silk flowers
  • Something to make small holes in fabric with (like an awl) 

A Ring of Power

  • Yellow construction paper or cardstock
  • Grey or black construction paper or cardstock
  • Markers or crayons
  • Glue sticks or craft glue
  • Scissors
  • Ruler or straight edge

Steps to Make It


Lembas Bread

  1. Make sure your butter is at room temperature and your oven is pre-heating!
    If your butter is cold and hard like Saruman’s heart then you can grate it (like cheese) into the sugar to skip the warming step. DO NOT microwave it to soften it.
  2. Cream the butter, honey, and sugar together by putting them in your mixing bowl and using a mixer on medium to high speed to mix them together until they are light and fluffy.
  3. Turn the mixer down (medium to low speed) and add the flour a bit at a time (so it doesn’t explode) while still mixing. It should be thoroughly mixed but may be a bit pebbly.
  4. Stop the mixer. Wash your hands. Prepare a clean work surface.
  5. Knead your dough (put some work into it). It will slowly become a smooth lump instead of lots of little pebbles.
  6. Roll out your dough to 1/2 inch thick or so and cut into lembas shapes (whatever you think that is).
  7. Line your cookie sheet with silpat or parchment paper (or butter it if you must)
  8. Bake lembas at 325° for 20-25 minutes or until golden brown
  9. Let cool so you don’t burn your fingers before eating!

Hobbit Cloaks

  1. Cut the T-shirt straight up the middle with your scissors. It’s okay if it’s not perfect.
  2. Cut the sleeves off your T-shirt — cut a straight angled cut from just below the armpit to account for the curve.
  3. Turn your T-shirt inside out
  4. Use your hot glue or double stick tape to seal your sleeve holes closed.
  5. Use a straight line of glue or tape, and glue the right sides (outside) together
  6. Turn your T-shirt right side out.
  7. Decide which side your cloak pin will be on (we know they go in the middle but we don’t have actual pins, so it will be on one side) and cut a small hole in the neckline on the other side.
  8. Pick up one of your sleeves and cut the hemmed section off. This will be your fastener.
  9. Cut the arm loop open at the underarm seam.
  10. Thread one end through the hole in the neckline (top to bottom), fold it over, and glue or tape it down to secure.
  11. Fold the loose end back in a large loop and glue or tape to secure. This should not be attached to anything right now. It will hook over your leaf to close your cloak.
  12. On the other side of the T-shirt neckline, make two small holes (cut them with scissors or poke with an awl).
  13. Fold your chenille stem in half and poke it up through the holes (inside to outside)
  14. Use the chenille stem to secure your button onto the collar by threading the ends through the holes in the button and twisting, then glue the remaining bits down onto the button
  15. Cut a leaf from your felt (not too big) or use a silk flower leaf; glue it onto your button
  16. Decorate!

A Ring of Power

  1. This is a numerical list of steps to make the craft
  2. Cut a strip of yellow paper about twice as long as it is wide (make a square and cut it in half if you don’t have a ruler)
  3. Fold your paper in half lengthwise and unfold
  4. Fold the two long sides to the middle.
  5. Fold the paper in half shortwise.
  6. ON THE CREASE, fold the two corners to the middle.
  7. Unfold back to where you have just the two long sides folded to the middle.
  8. Fold in half again, tucking the angle folds in, to make an arrow with the loose edges on the inside.
  9. Fold the long sides in to the middle on one side only, then fold the flap up.
  10. Turn the model over and fold the long sides into the middle, then fold the flap up.
  11. Pull gently on the flaps. The middle section will open out. Squish it into a box shape.
  12. Turn the ring over and slide one end into the other.
  13. Keep it secret! Keep it safe!
To make a chain to keep your ring on:
  1. Cut some strips of your grey paper about 3” long and 1/2” wide.
  2. Fold one strip into a circle, overlapping the ends, and glue them together.
  3. Slide a second strip through the first one and glue that circle together.
  4. Keep going until your chain is long enough to fit over your head
  5. Put your ring on its chain and use one more strip to close the circle.
  6. Prepare to walk into Mordor!

Want to craft live with us? Catch our next Craft-a-long on Twitch!

See our streaming schedule here!

a jester, leading


Missing Puzzle Pieces

Have a few puzzles that don’t have quite all of their pieces? We’re going to do some upcycling in this pair of projects!


…crafting offline? Download a PDF of the instructions here

Supplies: 

Puzzle Piece Friends:

  • Puzzle pieces (big ones work great)
  • Opaque paint and brushes
  • Craft or hot glue

Decorating supplies:

  • Yarn
  • Bling
  • Permanent Markers
  • Googly Eyes

Puzzle Piece Initials:

Steps to Make It

Puzzle Piece Friends:

  1. Paint your puzzle pieces on the cardboard side with a thin layer of paint and let dry.
  2. If you have a puzzle with shiny backs you may need a 2nd coat
  3. Glue on googly eyes with hot glue or craft glue
  4. Glue on some yarn hair
  5. Decorate your friends with paints, permanent markers, and bling

Puzzle Piece Initials:

  1. Either use one of our letter templates (cut off the extra and glue it down to the cardboard for easy cutting) or draw out your letter shape on your cardboard.
    1. Make it BIG (at least 6 inches)
    2. Make it HOLLOW (there should be plenty of room inside the strokes of the letter)
  2. Cut out your letter shape
  3. Paint your letter with a thin coat of paint so the cardboard color won’t show and let it dry.
  4. Glue down a row of puzzle pieces along the strokes of the letter.
    1. Try to cover the cardboard MOST of the way but don’t worry about gaps.
    2. It’s probably easiest to glue them picture side DOWN, but if you are using a dark color paint then you can glue them picture side up if you want.
  5. Paint each layer of pieces with a THIN layer of paint as you put them down, then let dry before gluing the next layer on.
  6. Glue a second row of puzzle pieces on top of the first row to cover most of the gaps
  7. Paint your second row. 
  8. Pick up your letter and make sure there are no weak spots (where the letter bends easily). If there are, make sure to start your third row by covering those weak spots.
  9. Fill in the third row however it looks good to you.
  10. Paint a thin layer of paint onto your puzzle pieces.
  11. Let the paint dry and then add another THIN layer.
  12. Keep adding layers until you are happy with the color.
  13. Add bling once your paint has dried!

Want to craft live with us? Catch our next Craft-a-long on Twitch!

See our streaming schedule here!


Valentine’s Day Bouquet

We’re making a Valentine’s Day bouquet! Keep it for yourself or give it to someone who likes flowers! 

We’re going to make several different kinds of flowers and then put them in a craft tube vase. 


…crafting offline? Download a PDF of the instructions here

Supplies: 

Felt Flowers

  • Felt pieces or fabric scraps
  • Chenille stem
  • Pony Bead
  • Hot glue (craft glue will also work)
  • Scissors

Optional:

  • School or craft glue
  • Glitter
  • Small plate for putting glitter on 

Cupcake Liner Flowers

  • Cupcake liners (small or large is fine)
  • Pony beads
  • Chenille stems
  • Craft glue

Button Flowers

  • Buttons
  • Chenille stems

Optional:

  • small bead
  • fabric or paper for leaf

Vase

  • A craft or toilet paper tube (sturdy is better)
  • Construction Paper
  • Scissors
  • Straight Edge or ruler
  • Something to draw a line with
  • Glue (glue sticks work well)
  • Decorating bling
  • Air-dry clay or Playdough

Steps to Make It

Felt Flowers

  1. Cut a long strip of felt or fabric (about 1½ to 2 inches tall and 8 to 10 inches long)
  2. Decide which edge is the top and cut a wavy pattern into it
  3. Attach a pony bead to your chenille stem by folding the stem in half and twisting
  4. This also makes sure your chenille stem can hold up your rose without drooping!
  5. Glue the felt to the chenille stem with the pony bead about halfway up it
  6. Roll the felt around the stem (try to keep the bottom even). Glue the bottom in spots if you need to.
  7. Glue the bottom HALF of the end of the felt roll down.
  8. Fold the top half of the felt roll over to make your rose
  9. If you want, you can cut a leaf out of the extra felt and glue it to your stem

Optional Bling:

  1. Pour a thin layer of glitter into your plate
  2. Apply a thin layer of craft glue to the top of the rose
  3. Tap the top of the rose in your glitter
  4. Let dry!

Cupcake Liner Flowers

  1. Take about 5-6 cupcake liners and flatten them all out (sort of)
  2. Fold your chenille stem in half and thread a pony bead onto it.
  3. Starting with one liner at a time, GENTLY poke the chenille stem ends through the middle and pull it up to the top under the beads
    DO NOT PULL TOO HARD or it will tear.
  4. Scrunch your liner up vertically so it is all folded in the middle.
  5. Add another liner and scrunch that one up around it
  6. Repeat until you like your rose
  7. Before you pull your last liner all the way up, put a layer of glue all the way around the bottom of the next-to-last liner
  8. Once you’ve scrunched your last liner up make sure to scrunch the bottom up into the glue you placed to hold it all together.
  9. If you want a leaf, fold a liner into quarters to make that and then glue it onto the chenille stem.

Button Flowers

  1. Pick out 3 to 5 buttons of various sizes
  2. Stack them up with the largest on the bottom and the smallest on the top
  3. Fold your chenille stem in half
  4. IF YOU WANT: Thread a small bead onto the chenille stem for the middle of your flower
  5. Starting with the smallest button, thread the two legs of your chenille stem through two holes in the button.
  6. Move from smallest to largest until all your buttons are on the chenille stems
  7. Twist all the way down to secure.
  8. Make a leaf with felt or paper scraps and glue it to your stems

Craft Tube Vase

  1. Use your craft tube to mark a line just the right height across the short side of the construction paper
    1. Mark the height of the craft tube on both ends of the short side
    2. Use your straight edge to connect the marks
  2. Cut off the strip of paper
  3. Glue it around your craft tube (it should wrap more than once)
  4. Roll out the clay to about 1/4″ thick
  5. Press your tube into it to create a weighted bottom
  6. Decorate with your bling!

Want to craft live with us? Catch our next Craft-a-long on Twitch!

See our streaming schedule here!

some crafted flowers


Motley Kids

at Who’s Yer CONline 2021

kids working on stream

March 19-21, 2021

The Motley Kids have missed conventions! We will be missing them in person for a little while longer (safety first!), but we’re excited to join Who’s Yer Gamers for Who’sYerCONline 2021!  We’ll be streaming craft-a-long events on Google Meet and we’d like to invite YOU to join us! 

You’ll want to have your Responsible Adult register for this FREE online convention at Tabletop.events — we’ll be posting our chatroom links on our events there! And while you’re there, Responsible Adults, check out all the other games and events that Who’s Yer Gamers are helping to facilitate!

Event Schedule

We’ll be conferencing in with our Motley Crafters to Google Meet; join us there for our craft-a-long! Links will be in the description of each event in our convention listing…

Keep an eye on this page and we’ll update the links as we get closer! 

Friday

11 AM

T-Shirt Pompom Monsters

Join the Motley Kids as we upcycle an old T-shirt into a pompom monster friend you can take with you!

a jester's hat with crafting hands

Craft Information

We’ll be cutting old T-shirts into yarn and making pompom monsters!  This craft is suitable for any age Kid, although younger Kids may need help cutting the T-shirt yarn.

Download Supply ListRegister

Friday

1 PM

Soda Bottle Fairy Houses

Join the Motley Kids as we make a custom fairy house out of a recycled soda bottle (any size) in this craft-a-long workshop!

a jester's hat with crafting hands


Craft Information

We’ll be upcycling soda bottles to make fairy houses. This craft is suitable for any age Kid, but Adult assistance will be needed for some of the soda bottle cutting steps. 

Download Supply ListRegister

Friday

3 PM

Mini Painting Techniques – Beginner

Matt will talk you through some paint-along techniques to help you get started with painting your own minis! This workshop is suitable for all ages, so bring your Responsible Adult along with you!

a jester's hat with crafting hands

Craft Information

We’ll cover some basic techniques: methods of holding the mini in place, painting small things, washes, dry brushing, possibly others.

Download Supply ListRegister

Saturday

10 AM

Magic Wands

Join the Motley Kids as we transform a sheet of paper into your very own magical wand!

a jester's hat with crafting hands

Craft Information

We’ll be making a rolled-paper magic wand! This uses a hot glue gun for best results, so Adults will want to stick close by. 

Download Supply ListRegister

Saturday

1 PM

My Little (Custom) Pony

Join the Motley Kids and Grow A Gamer and make your very own custom My Little Pony mod! This craft-a-long workshop will walk you through some modification techniques. We’ll talk about paint, hair, bling, and style choices!

a jester's hat with crafting hands

Craft Information

This is a custom craft—you will for sure want to have a pony, and probably some paint and permanent markers! The rest of the decorations are going to be up to you!

 We’ll walk through painting, hair coloring, and some ideas for pony alterations, decorations, and themes, as well as how to get your designs onto your pony.


Download Supply ListRegister

Saturday

4 PM

Bangles and Baubles

Join the Motley Kids and Grow-a-Gamer and craft some home-cooked custom jewelry in this craft-a-long workshop!

a jester's hat with crafting hands

Craft Information

This craft is suitable for any age Kid! However, it requires access to an oven (preheated to 325) and you will be baking plastic in it, so Adult assistance will be needed. 

Download Supply ListRegister

Sunday

10 AM

Sid’s Workshop

Join Nerdiqueen and Grow-a-Gamer for an Iron Crafting workshop. Bring your broken toys and spare bits and pieces and we’ll talk about ways to cut, glue, and craft them into new shapes! This workshop will use sharp objects and talk about some adhesives that WILL glue your fingers together if you’re not careful.

a jester's hat with crafting hands

Craft Information

This is just a partial list of supplies! Making a custom toy is a work of imagination; we’re going to discuss some techniques and inspirations you can draw from to make your own toys!

 Remember, we are going to be improving on our toys, so don’t bring heirlooms or one-of-a-kind pieces. Bring the toys that normally would be headed for the donation box — or better yet, the trash can!


Download Supply ListRegister

Sunday

Noon

Mini Painting Techniques – Advanced

Matt will talk you through some more advanced paint-along techniques to help you make your own minis a little more awesome! This workshop is suitable for all ages, so bring your Responsible Adult along with you!

a jester's hat with crafting hands

Craft Information

We’ll briefly cover some basic techniques: methods of holding the mini in place, painting small things, washes, dry brushing, and in addition to the beginner, we’ll cover layering and how to use transparent paints to achieve glow effects.

Download Supply ListRegister


DIY Dragon Puppets

Come craft a dragon puppet to celebrate the Lunar New Year! This year it’s on Friday the 12th of February, so we’re celebrating a little bit in advance…

There are many different ways to celebrate the Lunar New Year — this is just one!

…crafting offline? Download a PDF of the instructions here

Supplies: 

  • Craft tubes or toilet paper tubes (about 5 per dragon)
  • Several sheets of brightly colored construction paper in 2 or more colors
  • Ruler or straight edge
  • Pencil or something to mark on your construction paper with
  • Pompoms in several sizes (you may want matched pairs)
  • Scissors
  • Craft or tacky glue or glue guns
  • Felt or colored cellophane (or colored construction paper, whatever works)
  • A hole punch (or some other tool for making holes in cardboard)
  • Yarn or string
  • Two (or more) craft sticks
  • Dragon Decorating Bling!

Steps to Make It

Dragon Head:

  1. Lay your craft tube on the short side of your construction paper
  2. Mark the top of the tube on both sides
  3. Use a ruler to draw a straight line and cut your paper off. 
  4. Glue (or tape) your paper around your craft paper tube
  5. Fold a second piece of construction paper (we used a contrasting color) in fourths
  6. Draw your fierce dragon mane on your construction paper and cut it out. Make sure that you have a tab to attach it to the dragon! You should have four mane pieces
  7. Glue your pieces onto the sides of the dragon’s head. Stagger them a little bit to give some depth
  8. Cut some fringe and glue it to the back of your dragon’s head to make it Super Fierce!
  9. Decorate your dragon’s face with scales or patterns (we’ll add the eyes and nose next)
  10. Use hot glue or tacky glue to glue two medium pompoms to the top of your dragon’s head, just in front of the fringe
  11. Glue some googly eyes on the front of the pompoms
  12. Glue two more pompoms to the front of your dragon’s nose.  These are its nostrils!
  13. Cut some flames out of your felt/cellophane/construction paper and glue them into the mouth of your dragon!
  14. Use your hole punch to make 2 holes in your dragon’s head, straight across from each other.

Dragon Body:

  1. Cut 3-4 craft tubes in half to make short tubes.
  2. Wrap your half tubes with construction paper just like the head!
  3. Punch 2 holes in each end across from each other (they should line up front to back)
  4. Use yarn or string to tie the tubes together through the holes (keep the loops loose)
  5. Decorate your dragon!
  6. When you’re done, turn your dragon upside-down
  7. Have a Responsible Adult help you make a slit in the bottom of the head (near the neck) and in one of the last two tubes
  8. Insert a craft stick into each slit and glue it in place
  9. Use the sticks to make your dragon puppet move! 

Want to craft live with us? Catch our next Craft-a-long on Twitch!

See our streaming schedule here!


Chocolate Covered Pretzels

The Motley Kids needed a snack today, so we made some chocolate covered pretzels! You can join us if you like! 


…crafting offline? Download a PDF of the instructions here

Tools: 

  • A heat source (burner or stove)
  • Small plates for your sprinkles and decorating things
  • Spatula or spoon for stirring
  • Wax paper
  • Something for your pretzels to cool on (like a cookie sheet)
  • A double boiler
  • Don’t have a double boiler? You will need instead:
      • A small saucepan
    • A heat-safe bowl that will sit on top of your saucepan without falling in 

Ingredients: 

  • A bag of mini pretzels or pretzel sticks (you can sure make your own, but we didn’t)
  • Chocolate for dipping (chocolate/white chocolate chips, crumbled chocolate candy, etc.)
    You can use candy melts and this will make things less delicate.
  • Sprinkles, decorating sugar, etc for your pretzels 

Steps to Make It

  1. Prepare your sprinkles and decorations by putting a thin layer on your small plates
  2. Prepare your cooling area and set the wax paper on the cookie sheet
  3. Set aside 1/3 of your chocolate for later
  4. Fill the saucepan or bottom of your double boiler with about 1 inch of water
  5. Set it on the burner and heat over medium heat until it’s boiling
  6. Once it’s boiling, turn the heat down to low
  7. Put your larger chocolate batch into the bowl or top pan of the double boiler and place it on top of the bottom pan (THIS IS HOT).
    – The water should not touch the bottom of the top pan.
  8. Stir your chocolate in the top pan until it’s completely melted
    – Do not let water into the chocolate or it will seize up (clump)!
  9. Remove the top pan from the double boiler (THIS IS HOT).
  10. Add the remaining chocolate to your melted chocolate and stir until it is all melted.
  11. Dip the pretzels in the melted chocolate. You can reheat on the double boiler if needed.
  12. Roll or tap into your sprinkles
  13. Set on the wax paper to cool!

Enjoy! 

Want to craft live with us? Catch our next Craft-a-long on Twitch!

See our streaming schedule here!


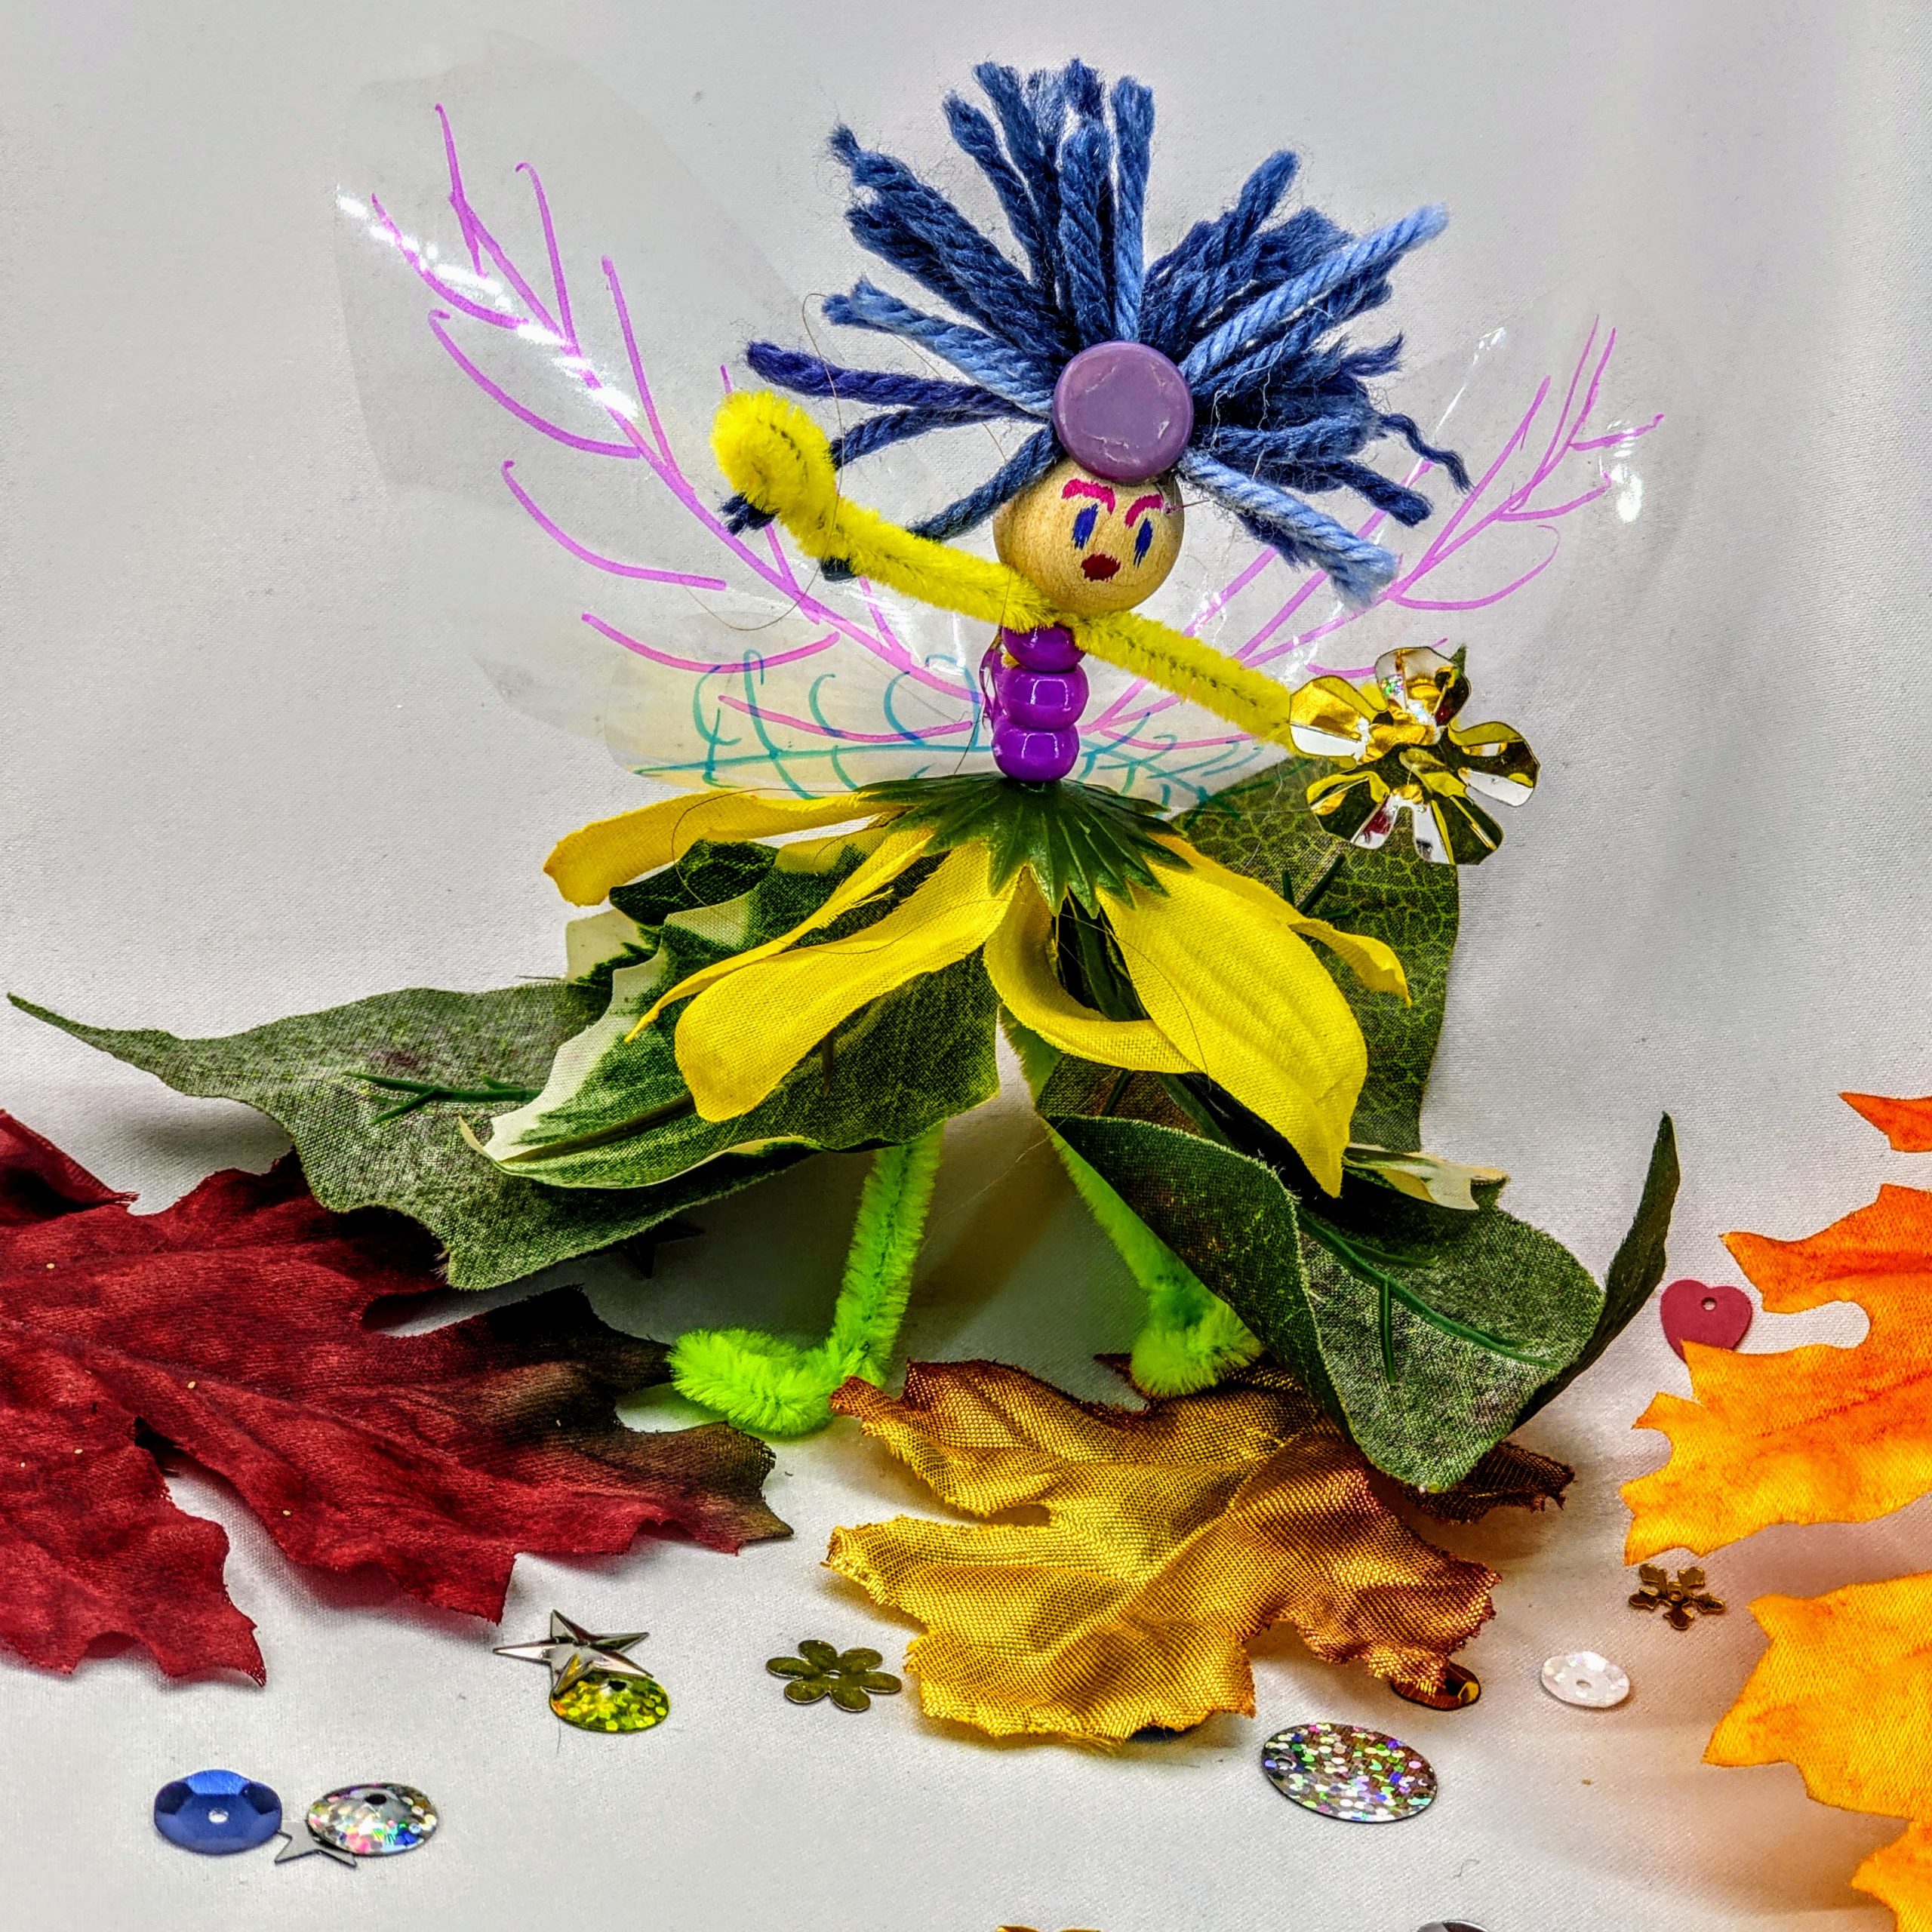
a flower fairy craft

Flower Fairies

We made some flower fairy friends! We also made a flower fairy rock band…


…crafting offline? Download a PDF of the instructions here

Supplies: 

  • Silk/fake flowers or garland (we are going to take them apart)
    (Motley Kids will often raid the home decor section at Goodwill for garland and flowers, or this is where you can send your old holiday garland when it’s worn out)
  • Glue Gun or Craft (tacky) glue
  • Scissors 
  • Large round beads (we usually do about a 1″ bead) or air-dry clay/Model Magic type compound
  • Chenille Stems/Pipe cleaners
    • One full length
    • One cut in half
  • Yarn or string
  • Smaller beads (pony beads work well)
  • Sharpie or other permanent markers (fine point)
  • Cellophane for wings (wax paper also works well)
  • Fairy decorating supplies
    • Buttons
    • Acorn caps
    • Fabric
    • Ribbon
    • Sequins etc

For Extra Fun (at the end of the video): 

  • A large disposable plastic cup
  • Construction paper 

Steps to Make It

  1. Disassemble your silk flowers — gently pull the flowers off the stems or cut the stems to free the petals and set the stems aside.
    We’re just going to use the flower petals (and leaves). 
  2. Take a chenille stem and fold it in half. This will be your fairy’s body
  3. Wind about 10-15 loops of yarn around your fingers
    1. the more fingers you use the longer your fairy’s hair will be
    2. the more loops you make the thicker your fairy’s hair will be
  4. Hook the chenille stem through the loops so they are hanging off the bend in the middle
  5. Thread your large bead onto your folded chenille stem (both ends) and push it up as far as it will go — it should pinch your fairy’s hair and hold it in place
  6. Your fairy’s hair is still a big loop.  Cut the loop to free the ends up.
  7. Wrap your half chenille stem around the folded one just below the large bead.  These are your fairy’s arms
    1. Fold the hands in so you don’t have sharp ends
    2. You can use little beads or air-dry modeling clay if you need bulkier hands
  8. Thread a couple of pony beads onto the folded chenille stem to make your fairy’s body
  9. Thread the chenille stem through the holes in your flower petals so that the petals point down. 
    Try layering several different petals or leaves!
  10. Thread one more pony bead onto the chenille stem to secure your skirts
  11. Separate the two legs of the chenille stem and fold some feet
  12. Put an awesome face on your fairy with your Sharpies
  13. Decorate your fairy!
    1. You can make wings with cellophane or parchment paper
    2. Fairies love sparkles and bling
    3. Use a button or acorn cap to make a hat!  

Want to craft live with us? Catch our next Craft-a-long on Twitch!

See our streaming schedule here!

a flower fairy rock band


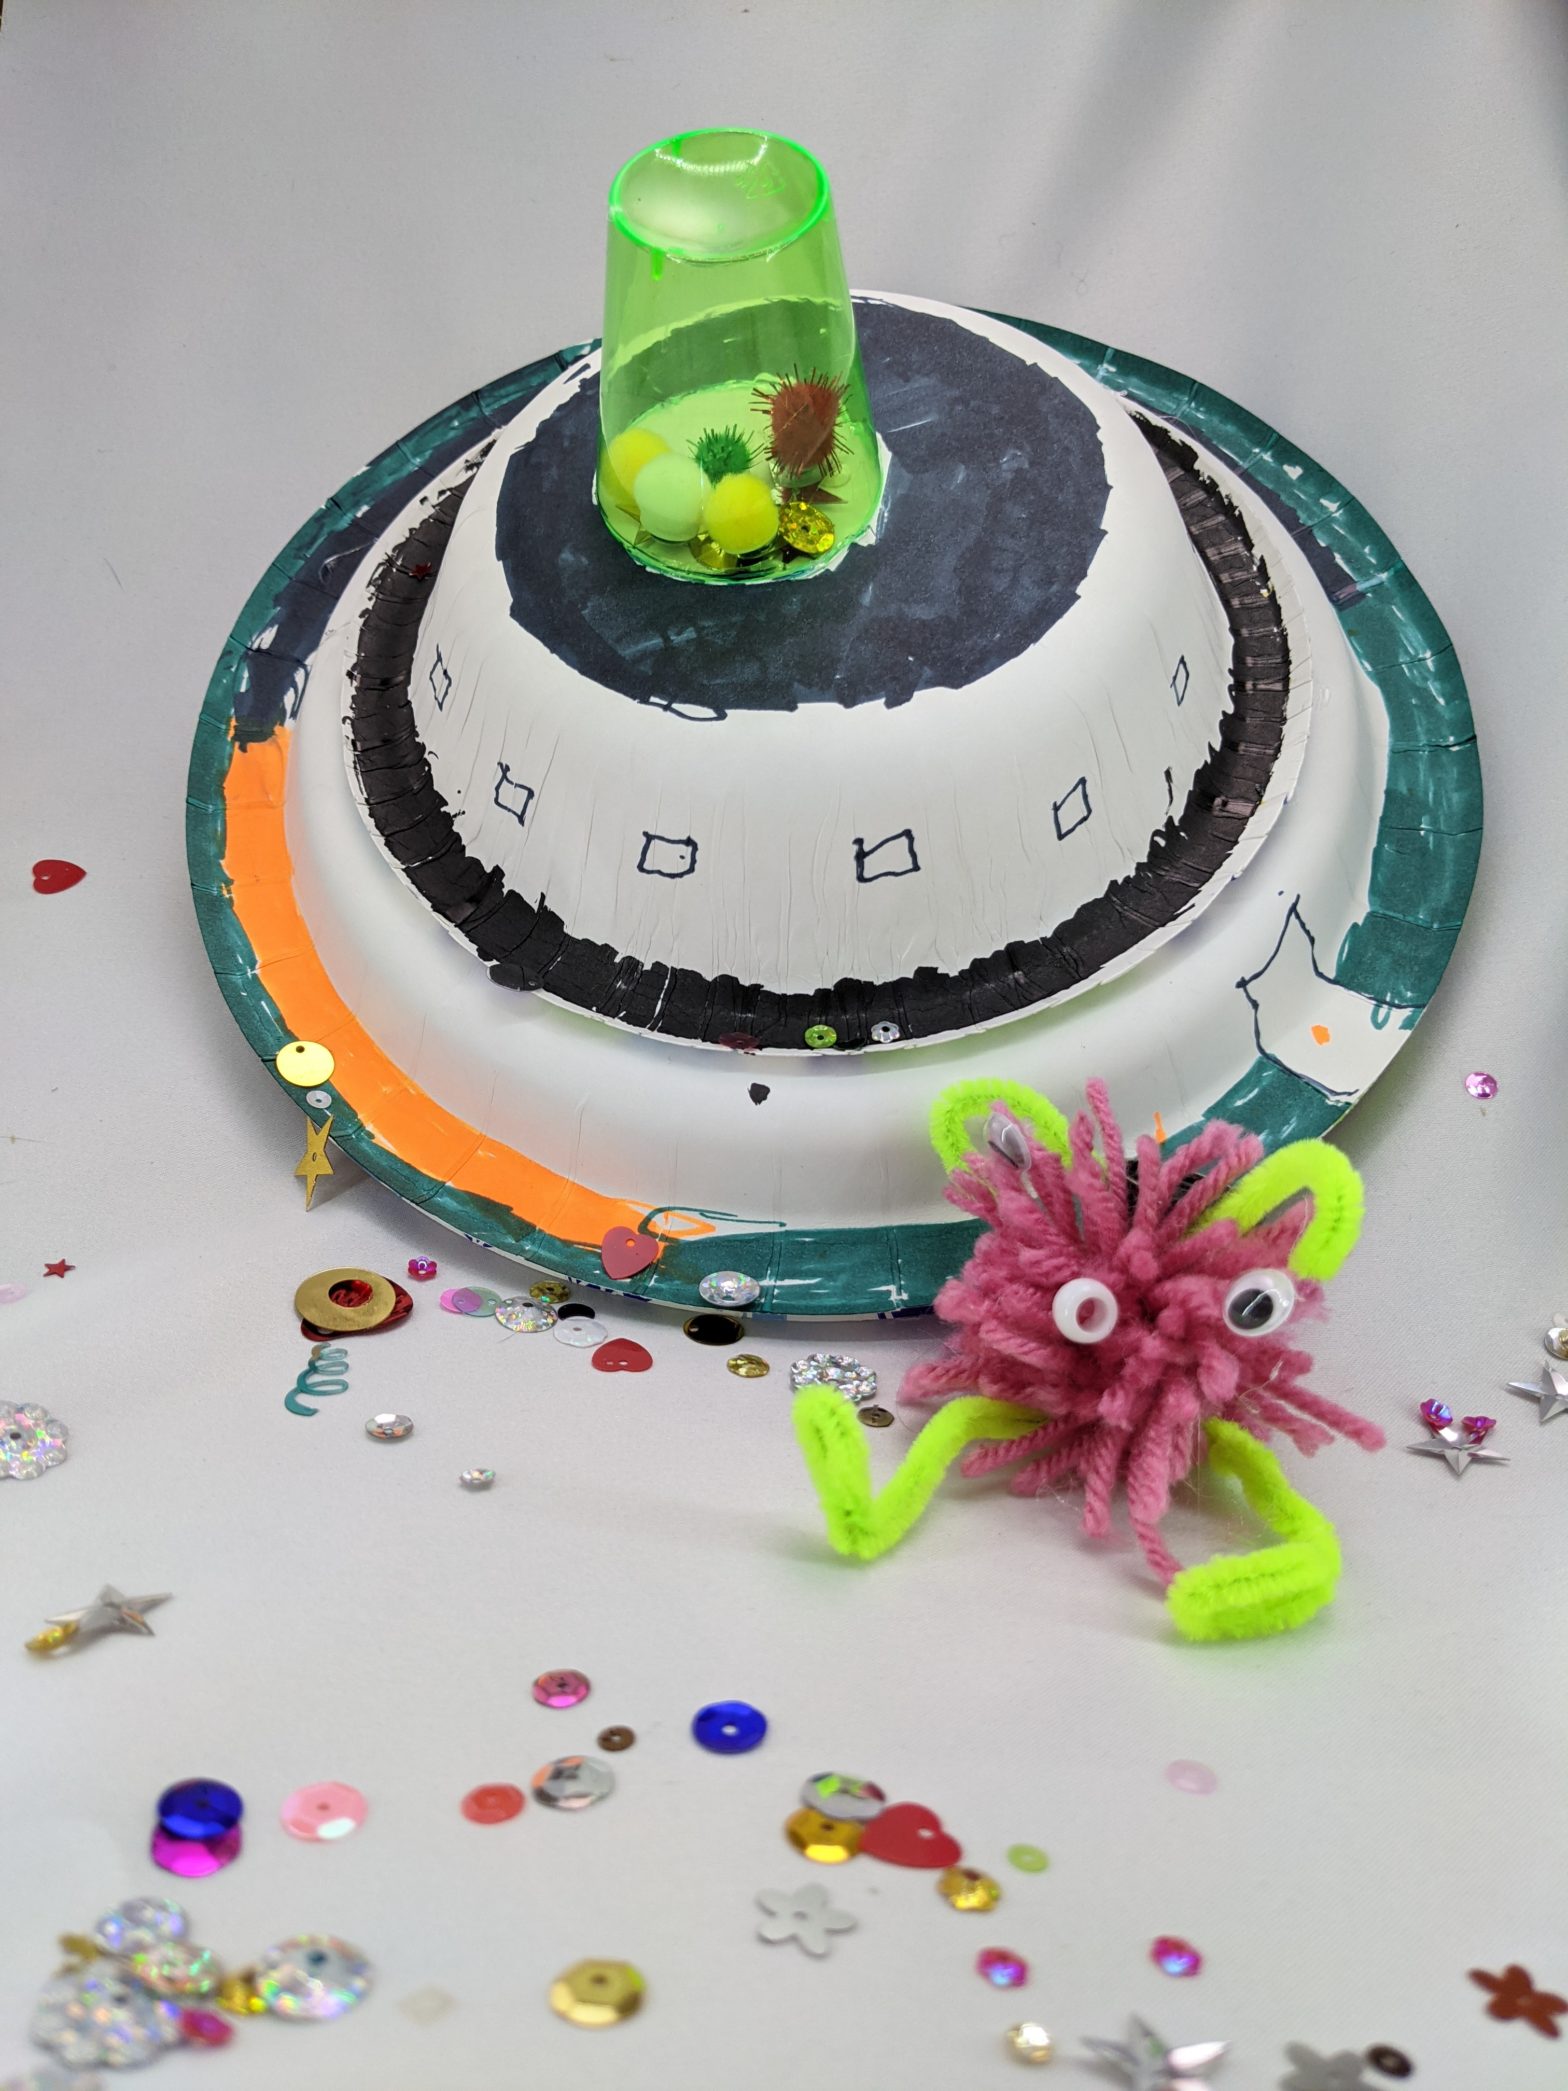
A UFO and a pompom alien

DIY UFOs & Pompom Aliens

Join the Motley Kids for a journey into space! We’ll make a paper plate UFO and then create pompom aliens to invade with!


…crafting offline? Download a PDF of the instructions here

Supplies: 

UFOs

  • Two paper plates (any plates will do but sturdy plates are better)
  • One paper bowl (again, sturdy is better)
  • A clear(ish) plastic cup, bowl, soup container, etc for your cockpit (this should be SMALLER than the bottom of the bowl)
  • Craft glue or low-temp hot glue
  • Paint, markers, stickers, and other bling for your UFO
  • Pompoms and sequins for your cockpit

Pompom Aliens

  • Cardboard for making pompom forms
  • Yarn (acrylic fluffs extra well)
  • Something large and round to trace around (about 3 inches across is good)
  • A round bottle cap to trace around
  • Scissors
  • Chenille Stems (pipe cleaners)
  • Googly Eyes and Alien Decorating Bling
  • Glue (glue guns or glue dots work best)
  • Bling

Steps to Make It

UFOs

  1. Glue your two paper plates together around the rims (the eating part is inside)
  2. Glue a paper bowl to the bottom of one paper plate to make your capsule (the eating part is still inside)
  3. Pick out your favorite alien sequins and pompoms
  4. You can glue some googly eyes on the pompoms if you want 
  5. Put them in your cockpit cup or jar
  6. Glue the bowl side of your UFO onto the jar by turning the UFO over  (do not turn the jar over! Your aliens will escape!) 
  7. Turn your UFO right side up
  8. Decorate your UFO!

Pompom Aliens

  1. Set your round thing on your cardboard and trace a circle. You can use different sizes of round things to make different sizes of aliens!
  2. Cut out your circle
  3. Put your bottle cap in the middle of your circle and trace it
  4. Cut a thin space from the outside of your circle to your inside circle
  5. Cut out your inside circle. This is your Alien Hatching Device (also known as a pompom maker)
  6. Wrap yarn around your Alien Hatching Device until it’s completely covered—this may take a few minutes, so be patient. 
    1. To keep your yarn from sliding, hold the end and wrap over it a few times
    2. Leave a space near the gap so your yarn doesn’t fall off
  7. Use scissors to cut along the edge of the Alien Hatching Device until all of your yarn is sticking out of the sides of the middle circle.
    (It should stay in place if you’ve made your alien Super Fluffy)
  8. Use a spare piece of yarn to tie tightly around the middle of your alien
    (this is an important knot so If you are not a Super Good Tie-er ask your Responsible Adult to help)
  9. Pull your alien free of the Hatching Device
  10. Fluff well!
  11. Trim scraggly bits with scissors if needed
  12. Use a chenille stem (or two or three) to make legs, arms, and antennae
    Wrap them around the middle of the pompom
  13. Add googly eyes or bling!
  14. Prepare to Invade!

Want to craft live with us? Catch our next Craft-a-long on Twitch!

See our streaming schedule here!

a paper plate spaceship and pompom alien

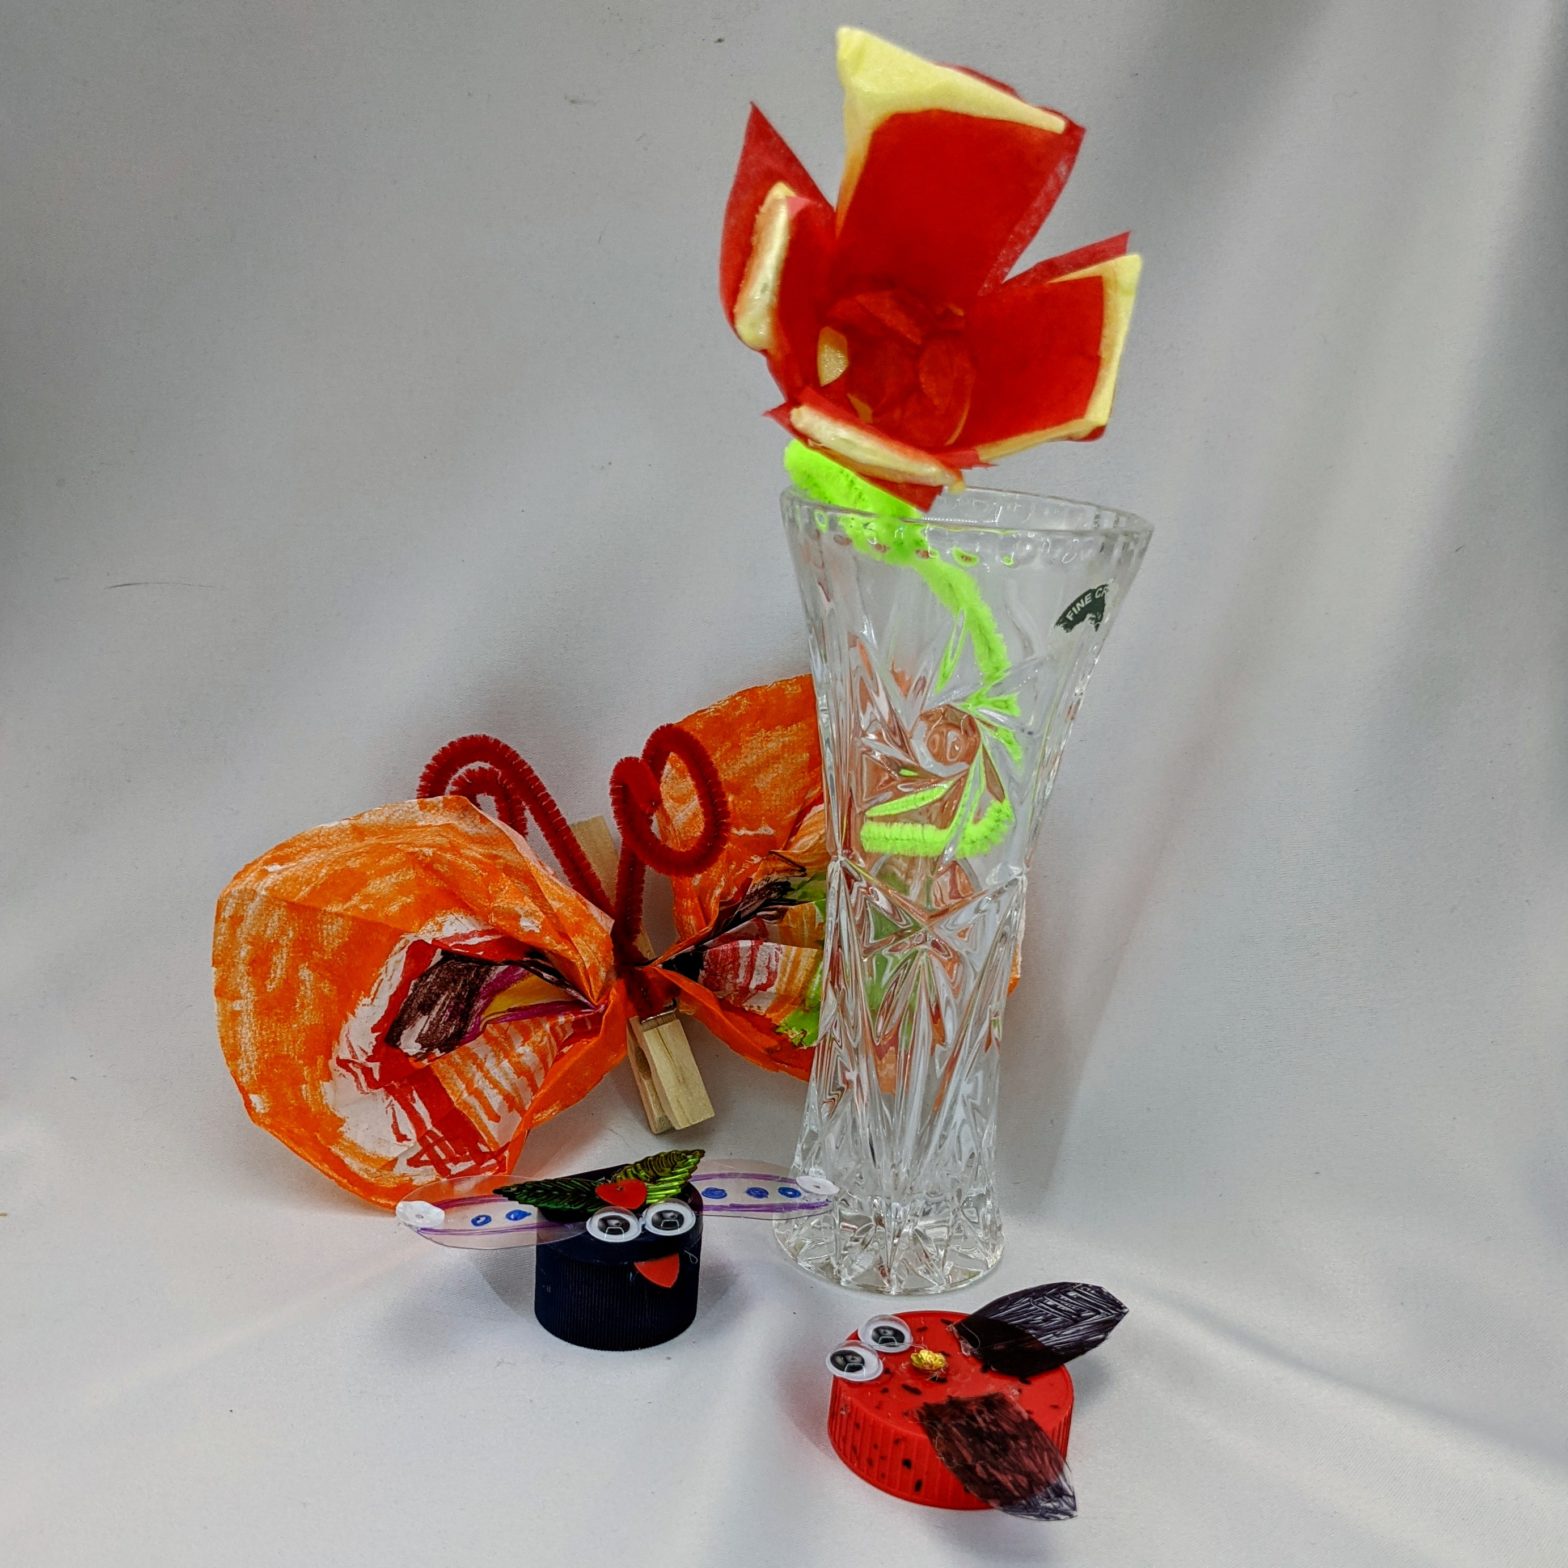
an upcycled garden

Upcycled Garden

We’re making a garden out of things we found in our kitchen! Come join us in this craft-a-long to make butterflies, bugs, and flowers.


…crafting online? Download a PDF of the instructions here

Supplies: 

Egg carton Flowers
  • An egg carton (foam or paper mache will work)
  • Chenille stems/Pipe
  • Cleaners (green if you want to be realistic)
  • Tissue paper
  • A pony bead or button
  • School glue (You may want a paintbrush to apply the glue)

Bottle Cap Beetles
  • Bottle Caps (screw-off tops are better)
  • Clear plastic lids (we aren’t picky about the type this time)
  • Sharpies
  • Googly Eyes
  • Bling
Coffee Filter Butterflies
  • Coffee filters
  • Chenille Stems
  • Water-based markers
  • Optional: Clothespins You will also need scissors, craft glue, and optionally glue guns

Steps to Make It

Egg Carton Flowers
  1. Cut one cup of your egg carton into a flowery shapes
  2. Thread a pony bead or button onto your chenille stem and bend it in the middle. Twist it once or twice to secure. 
  3. Push the ends of the chenille stem through the bottom of your egg carton cup. The bead should help keep it from pulling through. 
  4. Cut some small tissue paper squares and glue them onto the egg carton cup to make your flower brightly colored!
Bottle Cap Beetles
  1. Use your sharpies to color your bottle caps.  If you choose to paint them instead, make sure to let them dry completely before gluing!
  2. Cut a pair of wings out of the clear plastic lid. We suggest either cutting them out as a pair (think like a figure 8) or making sure you have a flat edge. 
  3. Use your Sharpies to decorate your wings
  4. Glue them onto the bottle cap
  5. Add some googly eyes and bling!
Coffee Filter Butterflies
  1. Use your markers to make spots on the coffee filters 
  2. Fold the filter “accordion style” and then fold once in the middle
  3. Use a chenille stem to tie it together at the fold
  4. If you want to have flowy butterflies, set the fold of the coffee filters in a cup of water for a few minutes — then let dry before expanding
  5. Expand your butterfly’s wings
  6. Curl your chenille stem into antennae
  7. If you want, hot glue your butterfly to a clothespin!
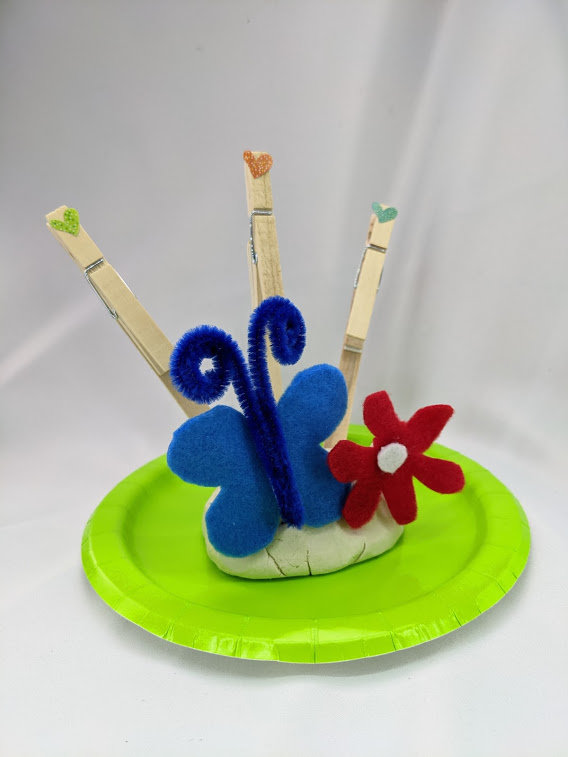
a photo stand with butterfly and flower

DIY Photo Holders

This easy-to-make photo stand came about because the Motley Kids needed somewhere to put some pictures Grandma sent in the mail! 

We did ours with a Garden theme, but you can build yours any way you want…spaceships, rockets, even Birthday Llamas (watch the video)!


…crafting offline? Download a PDF of the instructions here

Supplies: 

  • Clothespins (we used 3) 
  • Craft sticks (at least one per clothespin) 
  • A clean dry rock from outside (it should fit in your fist)
  • Air-dry or modeling clay
  • Glue guns or double stick foam tape
  • Felt or cloth scraps, chenille stems, paper, stickers, and markers to decorate with 
  • Scissors 
  • Paint or markers for clay decorating

Steps to Make It

  1. Mold your clay around your rock (this makes the picture holder heavy). You want to have extra clay in front and back
  2. Glue or tape a clothespin (clip opens up) to your craft sticks
  3. Decorate as desired
  4. Stick your craft sticks into the clay in the back of the rock
  5. Have your Responsible Adult break a craft stick in half. Decorate the smooth parts (leave the bottom clear)
  6. Stick the half sticks into the clay in the front of the rock
  7. Let dry and then paint your clay or decorate with markers!